Have you found yourself in the office with a Konica Minolta bizhub and you have no idea how to go beyond the defaults? We will take you through the basic settings you might need within Printer Properties to have you printing exactly what you want like a pro. Change the default, colour, size, paper, and layout settings to reach your desired printing results.
First things first, you can access your printer properties by opening your document. Hover over the top menu and select File > Print or use Ctrl + P (Windows) or Command + P (Mac) on your keyboard to bring up the print window. Select ‘Printer Properties’ located under your Printer selection.
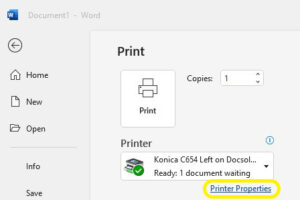
How to print in colour or greyscale on Konica Minolta bizhub
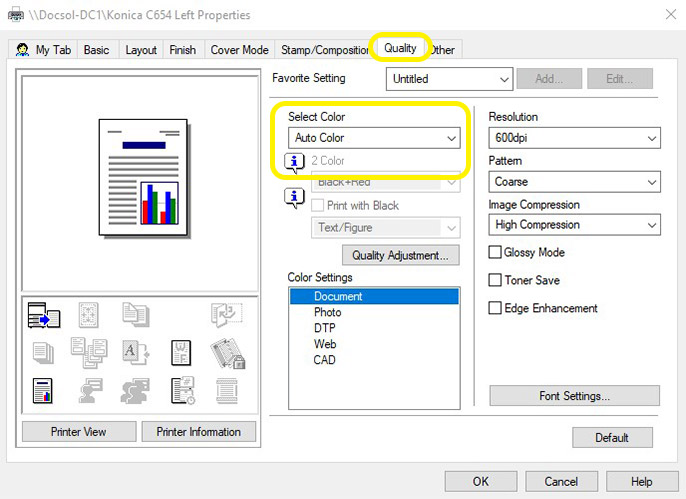
Your print will either default to colour or greyscale printing. To change this, start at the top menu and select the Quality tab. Under Select Color, choose between ‘Auto Color’ for colour printing and ‘Gray Scale’ for black and white printing.
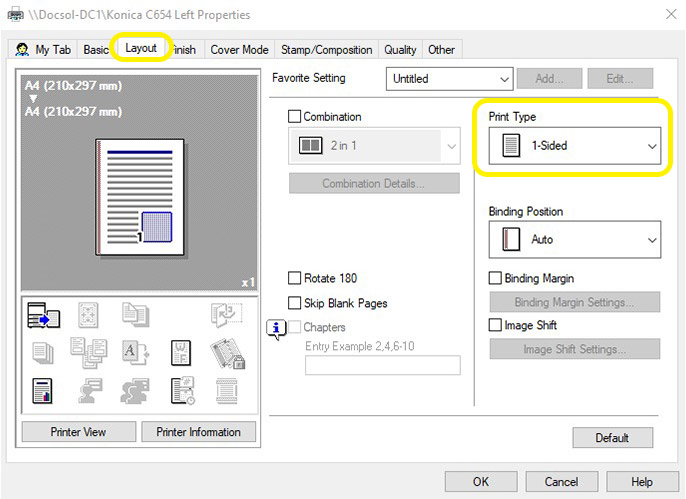
How to print double-sided on Konica Minolta bizhub
Select the Layout tab at the top. On the left, make your selection under Print Type for 1-sided, 2-sided, and if your bizhub copier has a finishing unit you can also choose Booklet.
How to change the paper size on Konica Minolta bizhub
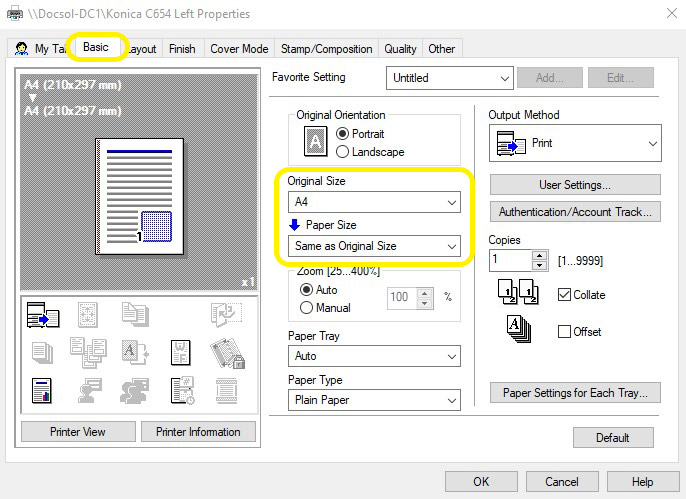
At the top, select the Basic tab. The Original Size should default to the actual size of your document (most likely A4), change this if the default size is incorrect. Below this field, you will see Paper Size – this is where you can select the size you would like your document to print.
Example: You have an A4 document you would like to print as A3 size. Original Size = A4 and Paper Size = A3.
How to print to a different paper tray on Konica Minolta bizhub
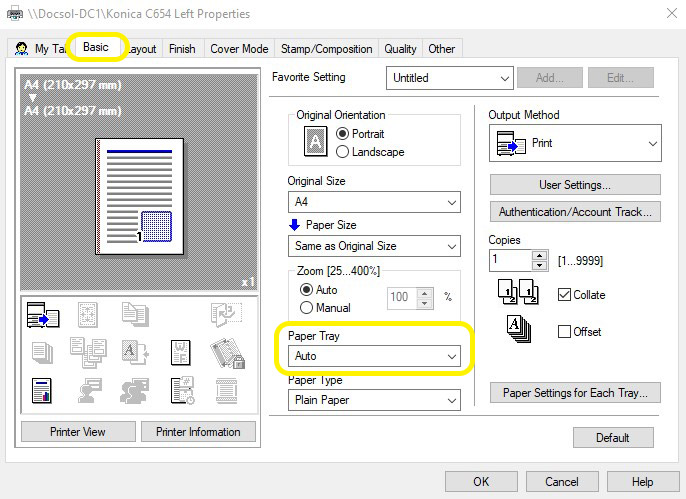
In the Basic tab, the Paper Tray option will default to Auto – this default is set by your installation company. If you need to print to a different tray, click to dropdown more options and select the tray you would like to print to. Make sure the paper in the tray you select is correct and aligned properly within the guides.
How to print on thick or special paper on Konica Minolta bizhub
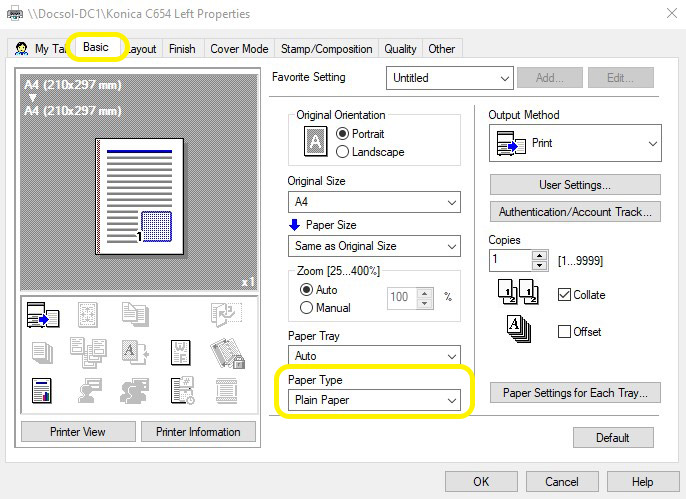
If you have ever tried to print on thicker paper stock and your device won’t do it, it may simply be a case of updating your settings so your Konica Minolta bizhub knows what it is meant to be doing. In the Basic tab, select the dropdown for Paper Type and choose a fitting type – Thick 1, Thick 2, Thick 3, or Special Paper, for example. This may require some trial and error to find the best setting for the stock you are using.
Please note, depending on the model of your machine, your bizhub may not be able to print on the thickness you have without causing a misfeed. If you are having issues, please contact us for assistance.
There you have it – the basics of Printer Properties on your Konica Minolta printer or multifunction copier. If you would like to dive deeper into bizhub knowledge, we have a suite of snappy video tutorials to show you how to print, copy, and scan, release prints with PaperCut, change the toner, troubleshoot a misfeed, and more at our Service Hub. You can also keep up to date with our tutorial content at our YouTube channel: Docsoltv.
